History
Mini 4WD was first created by the Japanese company Tamiya in 1982 as a powered variant of common plastic automobile model kits. Since then racing and tuning up mini 4WD cars have become a hobby for people across the world.

Other companies have ventured into the Mini 4WD market, and they include Tokyo Marui, Kyosho, Academy, Auldey, Okami, Gokey, HJH, Twinkk, and AA. Many of them introduced their own lines of mini cars, while some produce replicas of Tamiya cars, i.e. "Tamiya clones". The clones were a more affordable alternative to the more expensive Tamiyas, which gained popularity in the Philippines in the early 2000s, as well as several Asian nations.
To feed on the high popularity of the cars, Tamiya commissioned Shogakukan, a Japanese publishing company, to produce two anime TV series based on the Mini 4WD cars: Dash! Yonkuro in 1989 by Zaurus Tokuda, Bakusou Kyoudai Let's & Go in 1996, Bakusou Kyoudai Let's & Go WGP, Bakusou Kyoudai Let's & Go MAX, and finally Let's & Go!! Tamiya, The Movie.
Since 1997, mini 4WD cars were sold in the United States,though some hobby stores installed tracks, interest in the US has declined somewhat. Beginning with Racing, Tamiya's different Mini 4WD series include Super, Fully Cowled, Aero, and Mighty. Tamiya used to annually hold the Great Japan Cup, but the company stopped it in 1999 to promote their new product, "Dangun Racer", begun in year 2000. The latest Tamiya Mini 4WD model is the "Mini 4WD Pro", introduced in 2005. This is the fastest Mini 4WD product available out of the box, due to its super-efficient, completely redesigned internal layouts: polycarbonate body, double-shaft motor in the center, and the batteries on either side of the motor to allow low and balanced center of gravity.
Mini 4WD Assembly

Mini 4WD can be purchased in hobby stores or online. Few companies do not include an electric motorAA batteries, including rechargeable batteries. Its body frame has a frontal bumper extending sideways to hold the rollers for the tracks. An optional plastic bumper for the rollers comes for the rear of the body. For 4WD (four-wheel drive), traditional models conjoin the front and back wheels with an aluminum rod; as for the Mini 4WD PRO series, the motor located in the center of the body powers both the front and back wheels. The assembly package should come with a grease for the gears. Although the internal designs for the Mini 4WD's remain the same for the models of the same series, a plastic cover, which attaches with a lock at the back of the car, distinguishes one model from another; additionally, the wings on the plastic covers allow for improved down force and stability. required for the car to function. The car can be powered by
Upgrading a Mini 4WD

A Mini 4WD fresh out of the box will not be at its optimal level, and must be upgraded in order to participate competitively in racing contests. Tamiya, among other companies offers numerous upgrades to improve speed, stability, and endurance. Weights are also available for balancing. Any additions should keep the speed and mass of the minicar in accordance with each other, so that the gravity would nullify the momentum and imbalance of the vehicle, and prevent accidents at the curves of the courses.
Motor
For faster speed, better motors must be bought and upgraded. This can be done by combining internal parts (i.e. magnets) of different motors or adding homemade magnets or rotors.

There are three specifications that characterize all motors: RPM, torque, and power-consumption. RPM is the speed the motor provides, and the torque its strength. Higher the RPM means higher maximum speed and acceleration rate; Higher torque allows the car to better withstand the difficulties of climbing slope or running through turns.

The mini car should have at least two sets of gears in the assembly package for the motor to spin on. Different types of gears have different ratios of rotation of the motor and the wheel, and they include "3.5:1", "4:1", "4.2:1", "5:1", and "6.4:1". Higher the ratio, better the acceleration rate and torque; lower the ratio, better the maximum speed.
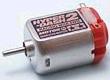
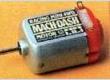
| Picture | Name | RPM (With Load) | RPM (Without Load) | Torque | Power Consumed |
| FA-130 Motor | 9900 | 13800 | 10 g-cm | 1100 | |
 | Touch Dash | 11200 | 15000 | 10 g-cm | 1300 |
 | Torque Tuned | 12000 | 13600 | 14.5 g-cm | 1200 |
 | Atomic Tuned | 13700 | 15700 | 10 g-cm | 1300 |
 | Rev Tuned | 14300 | 17600 | 10 g-cm | 1500 |
 | Hyper Dash | 17200 | 19300 | 10 g-cm | 1600 |
 | Hyper Dash 2 | ? | ? | 10 g-cm | 1600 |
 | Mach Dash | 20800 | 23400 | 15 g-cm | 1900 |
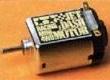 | Jet Dash | 23000 | 28000 | 22 g-cm | 4000 |
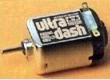 | Ultra Dash | 24000 | 29000 | 20 g-cm | 4000 |
 | Plasma Dash | 25000 | 29000 | 20 g-cm | 4100 |
Making Your Own Motor
If you think putting a Plasma Dash on your car will get you first place in races, then your're very wrong. Yes, a Plasma Dash may be the best motor available, but that's not even a fourth as fast as a motor that you build yourself. What do I mean? I mean that you can wind your own armature, get some really strong magnets, a good electric brush, put them together, and TADA! You've now got a motor that goes over 70 kilometers per hour. It sounds easy, but it requires a lot of brainwork and patience. It can be very hard for beginners. This guide is for people who already know how to wind their own motors, but still have questions.
You must remember one thing, torque is good for technical tracks and uphills, and RPM is good for straight tracks. For more torque, you need stronger magnets and larger commutators. Thicker wire is good for top speed, requires less winds, but takes up a lot of battery juice. Thin wire, on the other hand, is slower, but uses less battery power. Using these options, try combining different wires with different armatures and different magnets. Each way is good, but it's all for you to discover. Tires and Wheels

It is recommended that, among the different wheels available, the compatible ones must maintain the same size as those from the assembly packet. Smaller the diameter, more stable it is, as the car's center of gravity is lowered. Although one can easily assume that a larger wheel suits a faster car the best, this is not at all the case. Large wheels are for cars with high gear ratio (i.e. "5:1") and weak motor; small wheels are for cars with low gear ratio and strong motor. Wider wheels allow for more stability but suffer from friction, and, thus, speed loss; thinner wheels are intended for speed, but the car could be susceptible to flipping off the track.

There are four types of different wheels: normal plastic, one-way, aluminum, and lock-nut. Normal plastic wheels are fine, but they are not adequate for really fast cars. They become loose after disconnecting them from the axle several times. Additionally, they create drag when the car going through turns as the axle locks the two wheels at same speed, since the outer wheel must cover more distance than the inner wheel (relatively to the turn of the course). One-way wheels allow either side to roll faster than the other when turning, and minimize the speed loss in turns. Aluminum wheels are very light, sturdy, and best for speed. Some aluminum wheels have preventive measures against loosening with the axle. However, lock-nut wheels are the best in preventing the cars from losing the wheels during a run.
There are four types of tires: rubber, sponge, reston, and semi-pneumatic.. Rubber tires come as standard with the Mini 4WD, and, although it has good grip, it is heavy and is susceptible to slipping on wet surfaces. The alternate solution to the rubber tire are the reston or sponge tires, which are very light, have good grip, and are better suited for rainy days. Yet, these get dirty easily, and they tend to exhaust the motor.
Bumpers

Bumper is the front of the minicar, and there is an optional bumper attachable on the back of the mini car. Upgrading the bumper is unnecessary, unless, as mentioned above, the car needs more downforce to counter decrease in stability. Additionally, the standard plastic bumpers tend to bend, causing the rollers to run at angles and making the mini car fly off the course. Aluminum bumper is needed to prevent this from occurring.
Roller

Roller is the wheel that rests on either end of the mini car's bumper and glides against the wall of the course. This allows the car to change direction and maintain stability. Conventional roller will do fine on a car with average speed, but, on a much faster car, aluminum or ball-bearing rollers must be purchased to acquire additional downforce and stability. These rollers do not tilt in angle as the conventional plastic rollers, and, therefore, have better chance in preventing the car from flinging off the course. Ball-bearing rollers have small metal balls around the internal ring, on which the roller spins, in order to minimize friction. Some rollers consist of two rollers on a pole -one at the base and other at the top-, so that they may offer the best stability. There are three types of roller arrangements. The first one is in which all rollers are same-sized, and this is for straight courses. The second arrangement, in which larger rollers are stationed in the front, is less stable when running through corners but minimizes speed losses; the third arrangement, in which smaller rollers are put in the front, is more stable when running through corners but the car is more susceptible to speed losses as it pushes into the wall.


